

Treasure Note Envelope
Fold four flaps around a rectangle to make a little envelope for notes and paper treasures.
- 👶 Age
- Ages 6–9
- ⭐ Difficulty
- Medium
- ⏱️ Time
- 15–25 minutes
- ✂️ Collection
- Color, Cut & Build
- 🎯 Theme
- Treasure Note Envelope
About this activity
Fold four flaps around a rectangle to make a little envelope for notes and paper treasures. Draw a tiny treasure map to put inside. Use just the flap, without gluing the seal, for an envelope you can reopen.
How to do this activity
- Print on A4 or Letter in portrait, using Fit to page with all four borders visible. Use light card if your printer supports it, coloring pencils, child scissors and a glue stick. An adult helps with cutting. Color before cutting; leave glue areas uncolored.
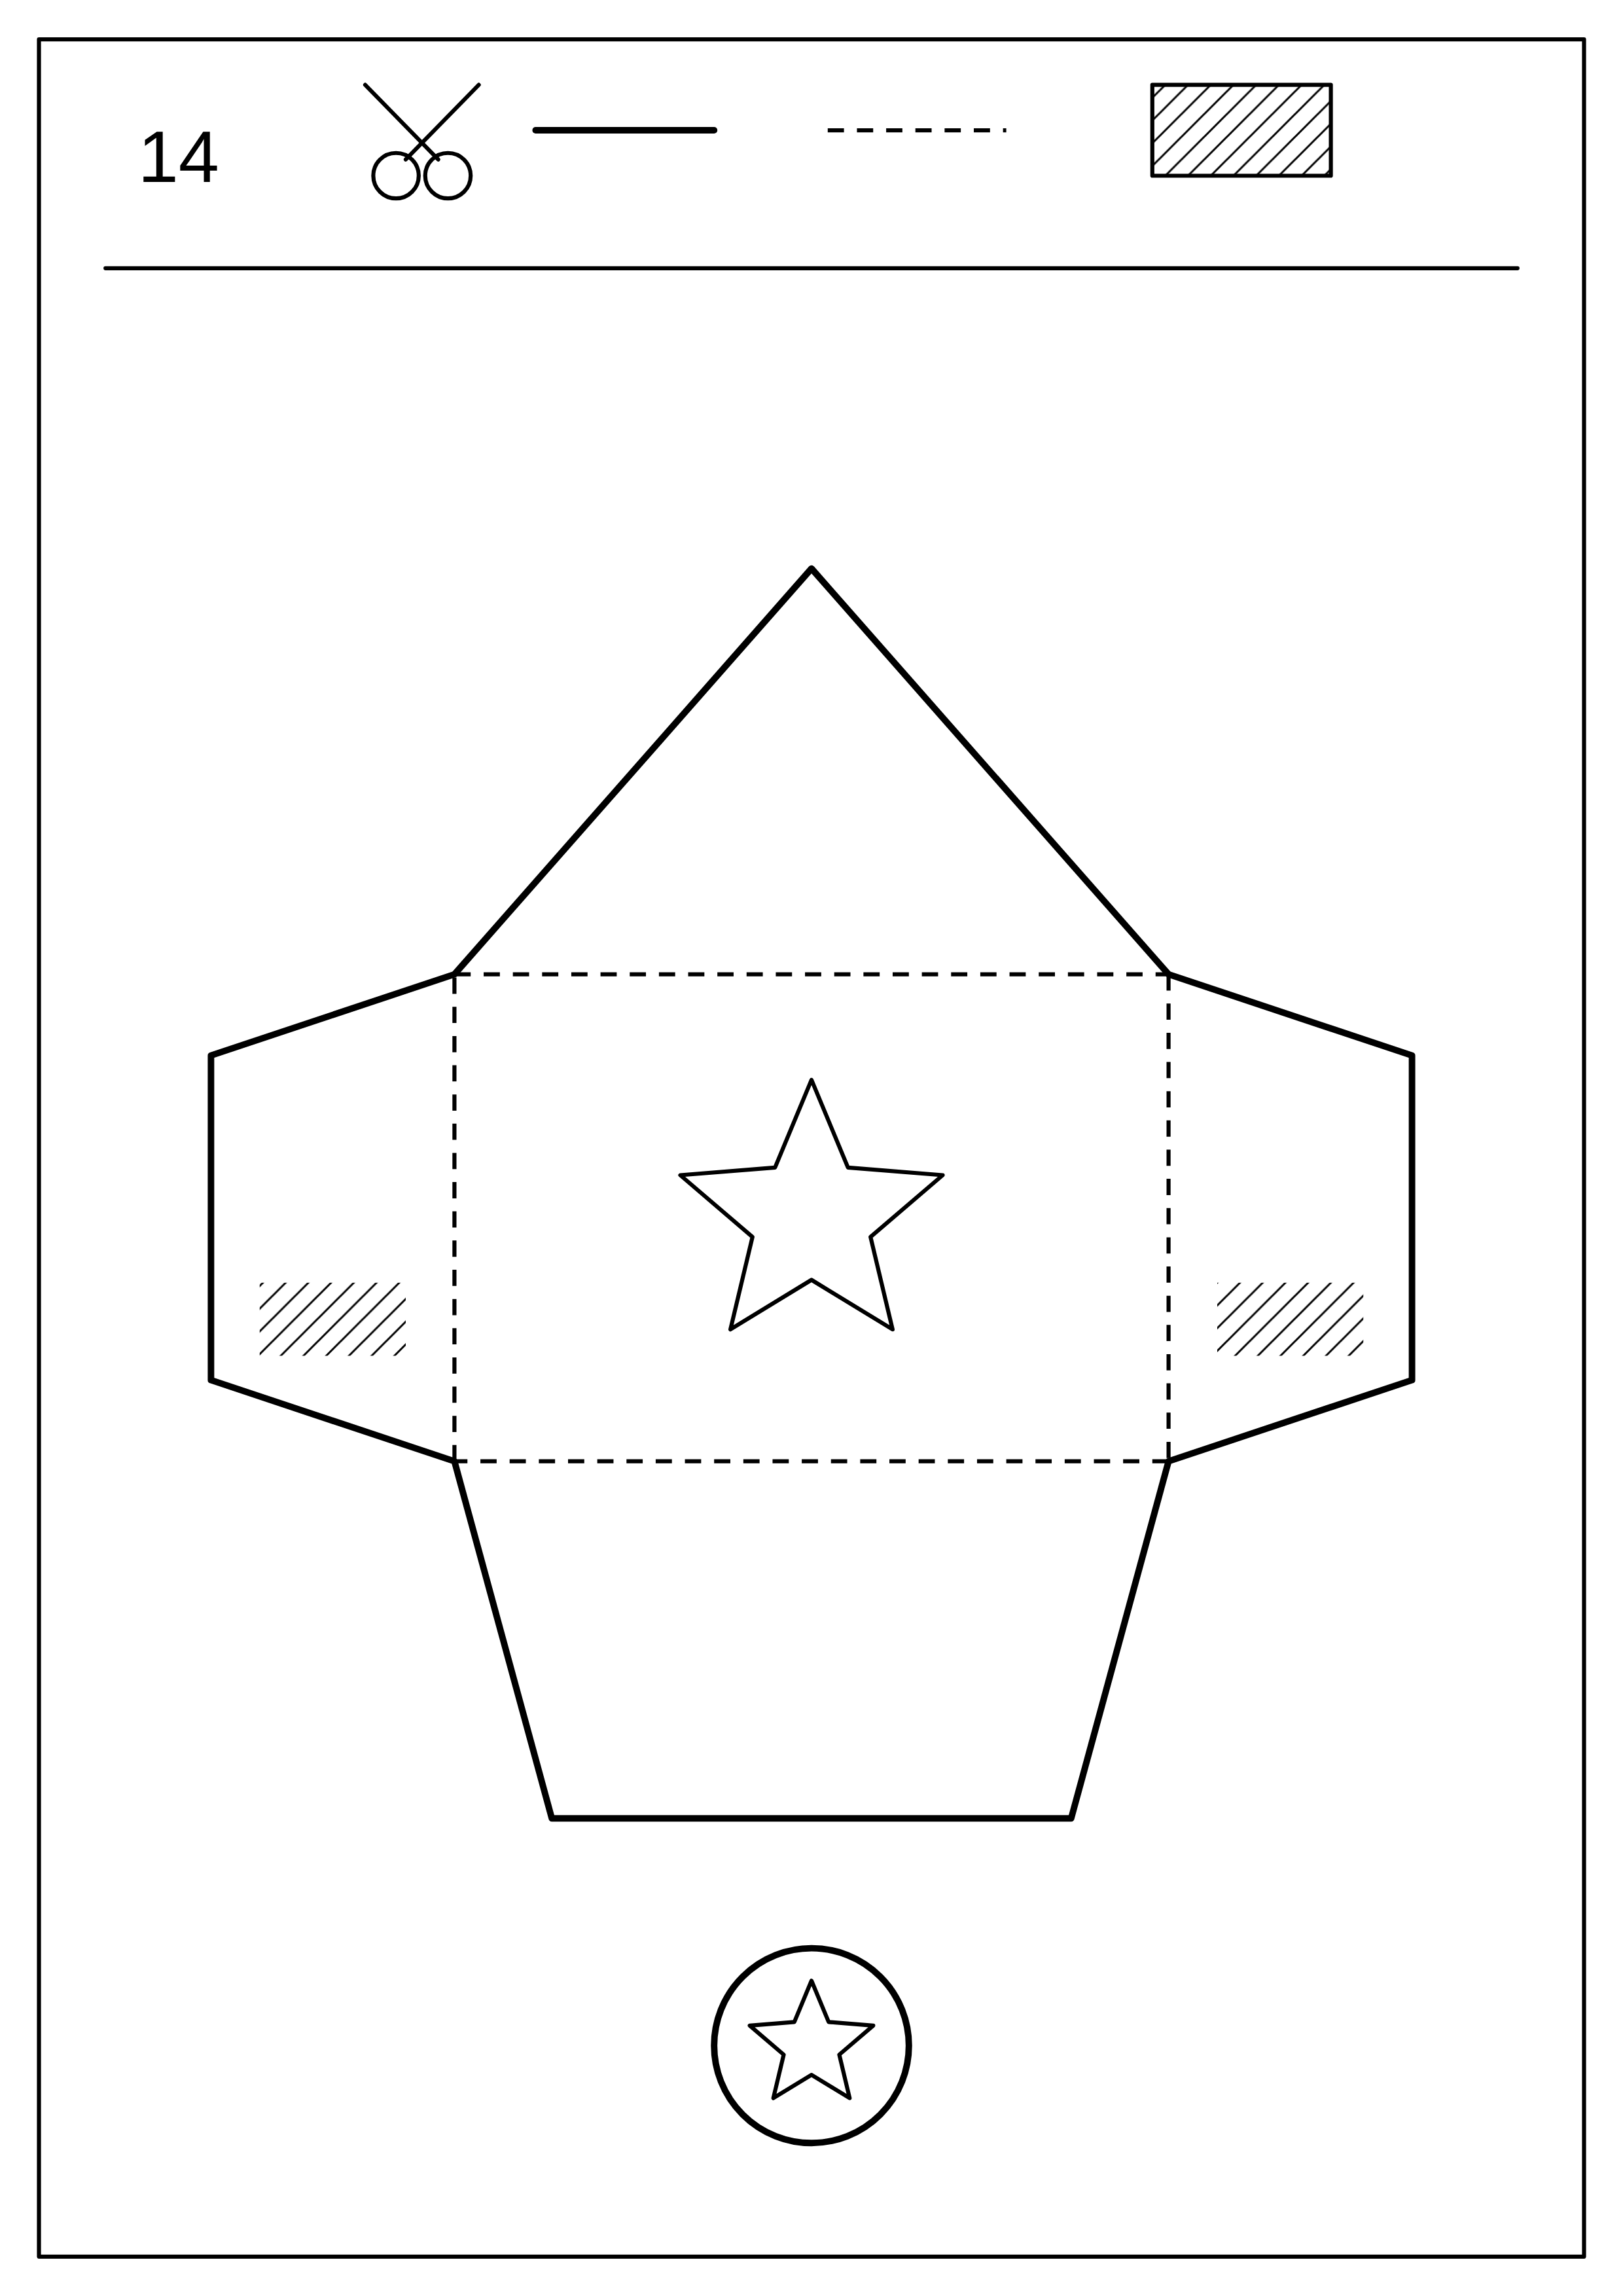
- Cut the envelope outline as one piece and cut the circular seal. Pre-fold the four dashed lines, then open the flaps again.
- Lay the decorated side face down. Fold the left and right flaps inward. Their hatched patches now face up; put a little glue only on those patches.
- Fold the bottom flap up over the glued patches and press. Leave the upper opening free. When dry, add a note, fold down the triangular flap and use the star seal to close it if you wish.
Tips for parents and teachers
- The top row is a key, not a piece to assemble: thick outside lines are cut lines, dashed lines are folds and diagonal hatching marks glue. Thin lines inside the pieces are decorations. The page border is not part of the model.
- Draw a tiny treasure map to put inside. Use just the flap, without gluing the seal, for an envelope you can reopen.