
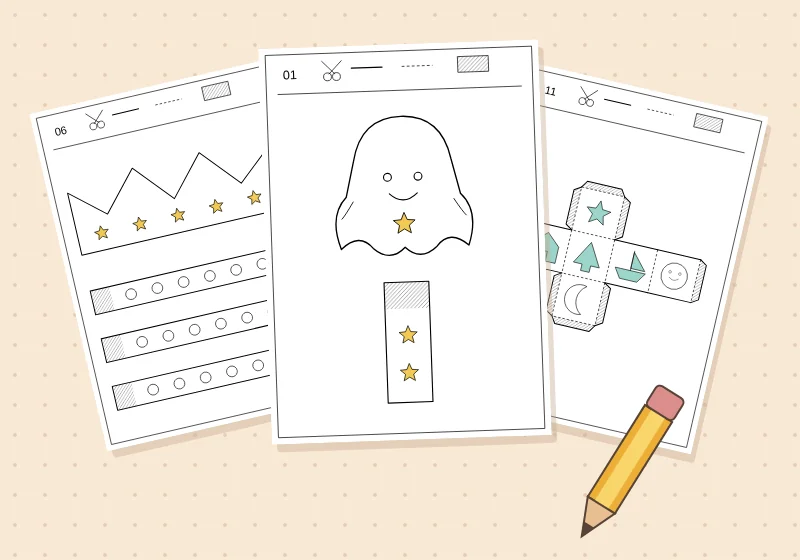
A colored ghost becomes a puppet; a flat cross becomes a basket; two trees slide together and stand up. With Color, Cut & Build, the finished picture is the beginning of another game. The collection contains 15 free templates, each with its own assembly guide in English, Italian and Spanish.
The suggested range is 5–9 years, with simpler cuts for a first project and more precise folds for children who enjoy a challenge. Choose by interest and comfort with the tools. One small project is enough for an afternoon; there is no need to finish the whole collection.
Choose what you want to make
- Start with a character or collage. Try the Boo puppet (01), lion puppet (02), rocket collage (04) or friendly robot (05). Boo has broad curves; the lion’s zigzag mane needs more turns. The collages need a separate background sheet.
- Explore a fold. The butterfly (03) has raised wings, the caterpillar (08) folds back and forth, and the owl place card (09) stands like a tent with just one fold.
- Make something for pretend play. Fit a party crown (06) or star cuff (07), hide a note in the treasure envelope (14), or set up the animal theatre (15).
- Try a small model. The slot-together tree (10), story cube (11), house (12) and basket (13) involve narrower cuts or several joins. Their guides suggest ages 7–9, with adult help where useful.
Prepare the paper and tools
Gather colored pencils, child scissors and a glue stick. An adult can help with cutting, especially the tree’s narrow slots. Ordinary paper works for the collages and envelope; light card holds its shape better for puppets and standing models. Check which paper weight your printer supports.
Open a project’s guide and choose Print or Save, or download all 15 templates as a PDF. Print in portrait on A4 or Letter using “Fit to page,” keeping the complete border visible. All pieces for each project share one page, so they stay in proportion. The PDF contains the templates; the assembly instructions remain in the online guides.
Read the markings before cutting
- Thick outer contours: cut around the pieces, keeping any attached tabs.
- Dashed lines: fold rather than cut.
- Diagonal hatching: apply glue where the project’s guide indicates.
- Thin inner lines: details to color, such as eyes, windows and stars.
The number identifies the sheet. The top row is a key, and the page border is a frame: neither is a piece to assemble. Color first while the paper is easy to hold, leaving glue areas uncolored. Try fitting the pieces together before applying glue.
A first project: bring Boo to life
- Open Boo’s guide and print sheet 01. Choose colors for the ghost, star and handle.
- Cut around Boo and the separate rectangular handle. Keep the face and stars inside their shapes.
- Put glue on the hatched end of the handle and press it behind the bottom of Boo, with both decorated sides facing you.
- Let the join dry flat before lifting the puppet. Give Boo a greeting and introduce a toy as a new friend.
If cutting is still tiring, an adult can prepare the pieces while the child chooses colors and directs the assembly. For a project without glue, choose the owl place card, slot-together tree or animal theatre.
Keep the game going
Place Boo in front of the theatre, roll the story cube to choose the next story detail, or put a tiny drawing inside the envelope. In a classroom, children can choose different projects and bring them together into a shared village or performance. A tray for each project keeps loose pieces together while glue dries.
Fit crowns and cuffs loosely, then remove them before trimming and gluing. Carry the basket by its base: its paper handle is decorative. Keep finished models in a shallow box and return to coloring or storytelling another day.
Try it with these printable pages
- Browse all 15 Color, Cut & Build projects and choose your first guide.
- Make Boo’s paper puppet for a short first session.
- Build the animal theatre to give your characters a stage.